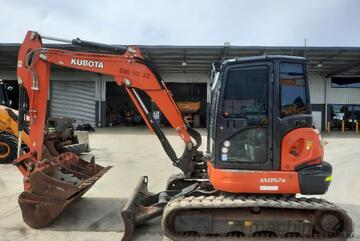
A step-by-step guide to replacing rubber tracks
Changing the rubber tracks on your vehicle is a task almost anyone can complete. With over twenty years of experience, we’ve learned the best way to replace rubber tracks. This guide breaks down the replacement of rubber tracks into ten easy steps so you can get the job done quickly and safely.

Step 1
Before you do anything to your tracks, park it somewhere that is safe and level. Place some blocks or boards underneath your machine to make sure that it remains stable while you’re working on it.
Step 2
Locate your grease fitting (usually behind a panel in the centre of the track) and release some of the grease. This will reduce the tension on the track, making it easier to remove. This is also a good time to inspect the fitting and see whether it is in good condition or needs replacing.
Step 3
Carefully push the front blade down on your machine until the vehicle starts to tip upwards. This will suspend your tracks in the air, giving you enough access to remove them. If available, a heavy-duty jack stand should be placed underneath your vehicle to help provide extra safety support.
Step 4
Attempt to remove one end of the track from the sprocket teeth that it is resting in. Even with the reduced tension, this may be impossible to do by hand. If you have a friend nearby, get them to assist by slowly “driving” the suspended vehicle forwards while you use a metal bar to pry the track off the teeth.
Step 5
Remove the track fully – this should be simple to do after you dislodged the first end in the previous step. The track itself will be quite heavy and may require two people or even a forklift to lift off safely.
Step 6
Line up your new track with the sprocket and hook it onto the sprocket’s teeth. This may require a helper or machinery like a forklift.
Step 7
Have your assistant turn on and “drive” the vehicle once again, slowly moving the track forward. While this is happening, use the same metal bar from before to align the front of the track with where it needs to rest.
Step 8
While still safely suspended, allow the track to spin for a few rotations and assess how it is performing. Check that it is moving correctly, that it is correctly seated on the sprocket, and that it appears to fit and function properly.
Step 9
Put tension back into the track by replacing the grease fitting and any grease that was removed.
Step 10
Repeat steps 2–8 for the tracks on the other side of the machine, if required, then remove the jack and carefully lower the track back down to the ground. Give your work one final check in a controlled environment before you put your vehicle back into everyday use.
How to Replace Skid Steer Rubber Tracks
This video dives into everything you need to know about replacing damaged or old skid steer tracks on a Compact track loader (CTL). Watch now to learn the simple steps you’ll need to understand in order to safely remove your CTL tracks. This video is intended as a general guide only, and should be used alongside your specific vehicle’s manual.
How to Replace the Rubber Tracks for Mini Excavator
If you own and operate a mini excavator, this instructional video contains all the information you’ll need to quickly and safely replace your mini excavator tracks. This video is intended as a general guide only, and should be used alongside your specific vehicle’s manual.
The Rubber Track Experts
Whether you drive a CTL or excavator, rubber tracks are important for the safety of you and the people around you. If you have any questions about how to replace your rubber tracks, or want to know more about track fittings in general, then TradeFaire International are here to help. With decades of experience and expertise as rubber track suppliers, we’re at your service to make sure you get exactly what you need. Get in touch with our incredible team today at 1300 915 078 or fill out our online contact form.
